
First-time setup
You only do this setup once — after that, connecting is a single tap. Every image below is a real screenshot, not a mockup.
Before you start
The Mac (the one being controlled)
macOS 13 or later. Get the free TouchNow Host from touchmac.app — this end is free forever, and there is no account to create.
Your iPhone or iPad (the one in your hand)
iOS / iPadOS 15 or later. Get TouchNow from the App Store.
The same Wi-Fi
On the same Wi-Fi everything is free. You only need the Remote Access subscription to reach your Mac from somewhere else.
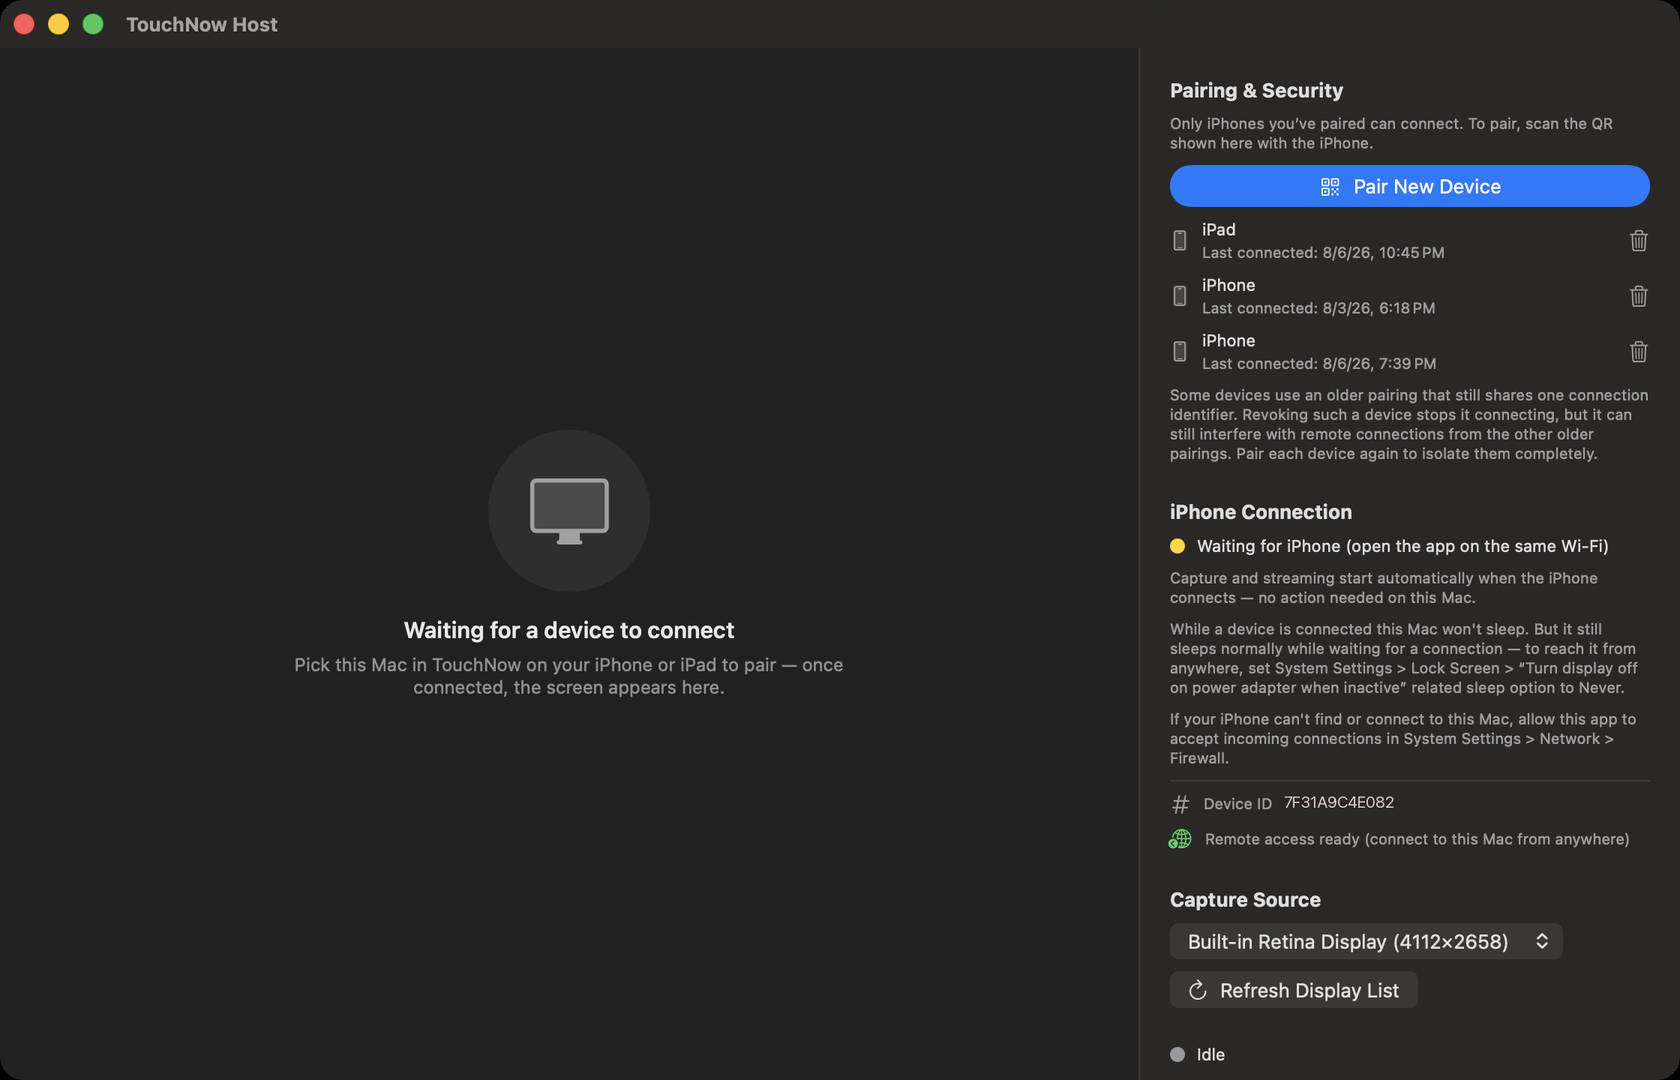 Click here
Open TouchNow Host and click “Pair New Device”
It sits at “Waiting for a device to connect” — that is normal, because no iPhone is authorised yet. The blue button under Pairing & Security on the right is where you start.
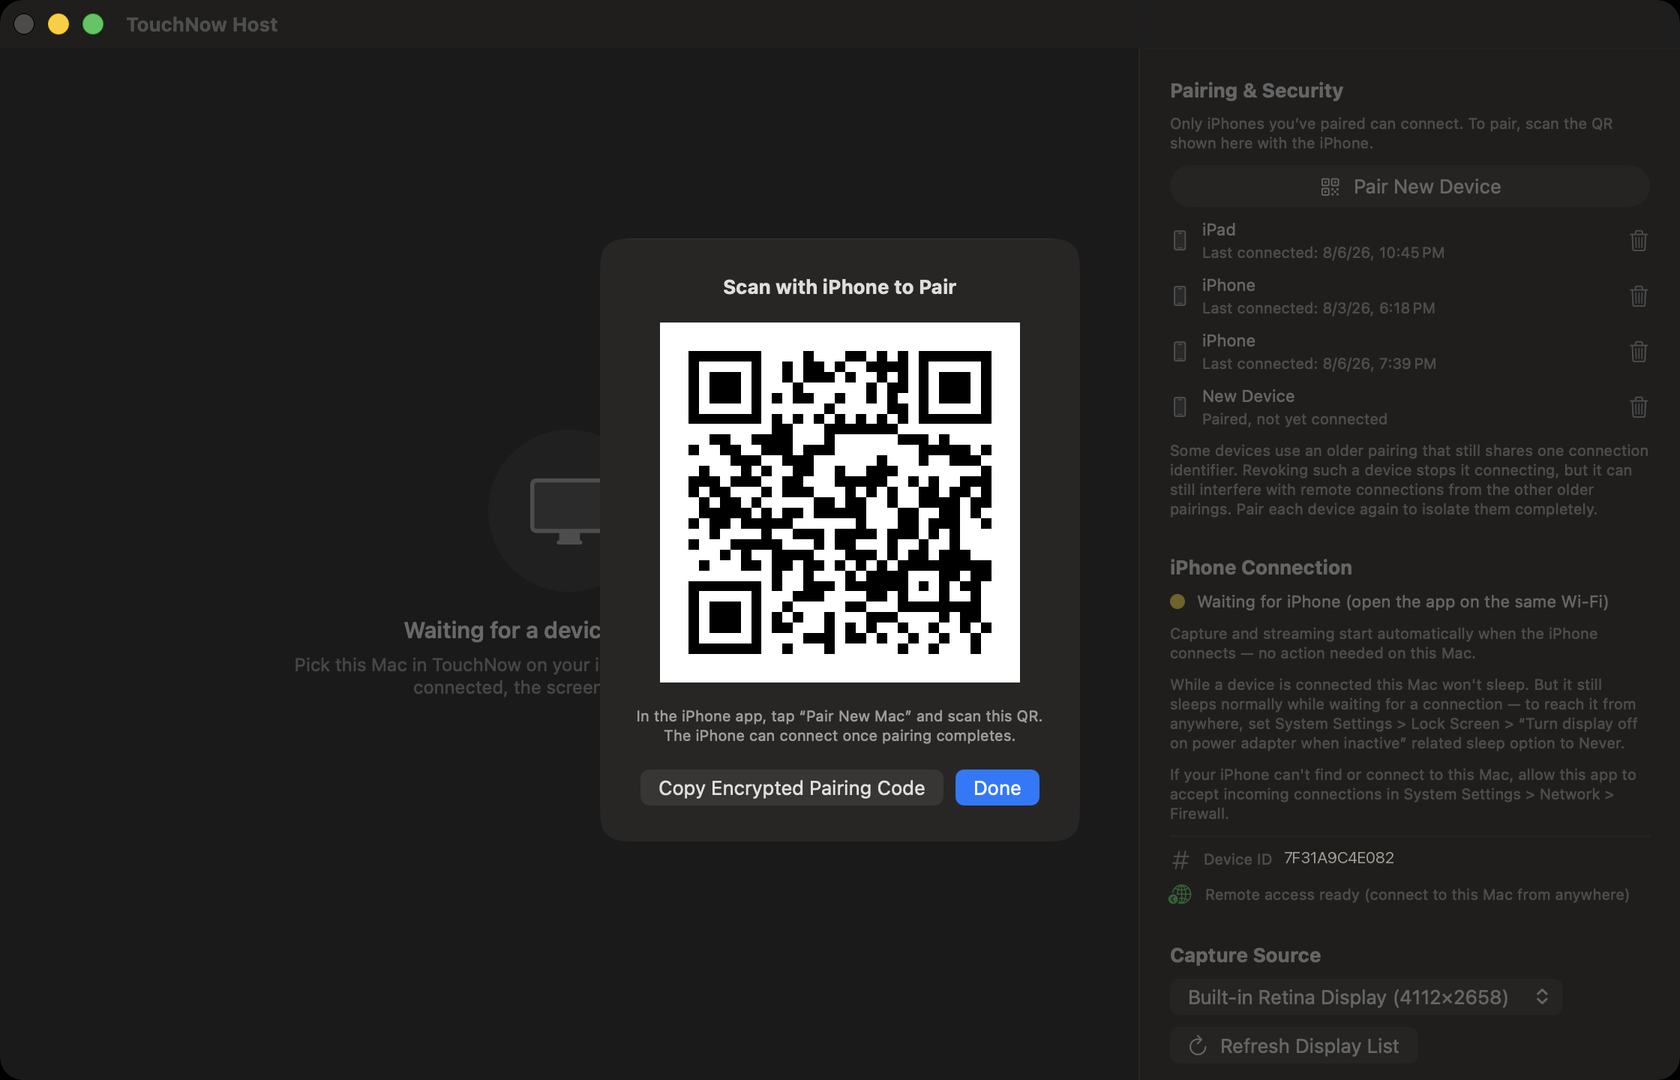 You’ll scan this next
A QR code appears in the middle
Leave this panel open. The whole pairing runs off this QR — without it there is nothing for the iPhone to scan.
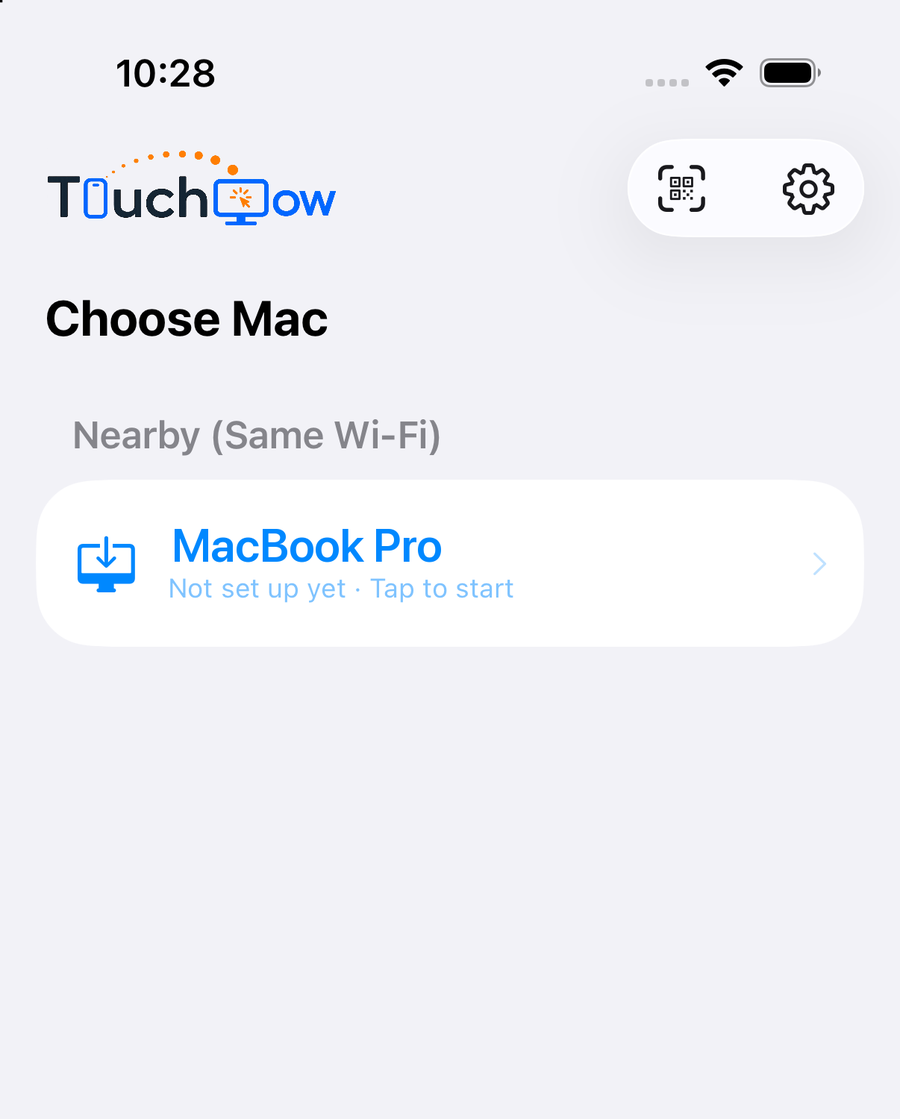 Tap your Mac
Open TouchNow — your Mac shows up on its own
On the same Wi-Fi the app finds that Mac by itself, labelled “Not set up yet · Tap to start”. Tap it.
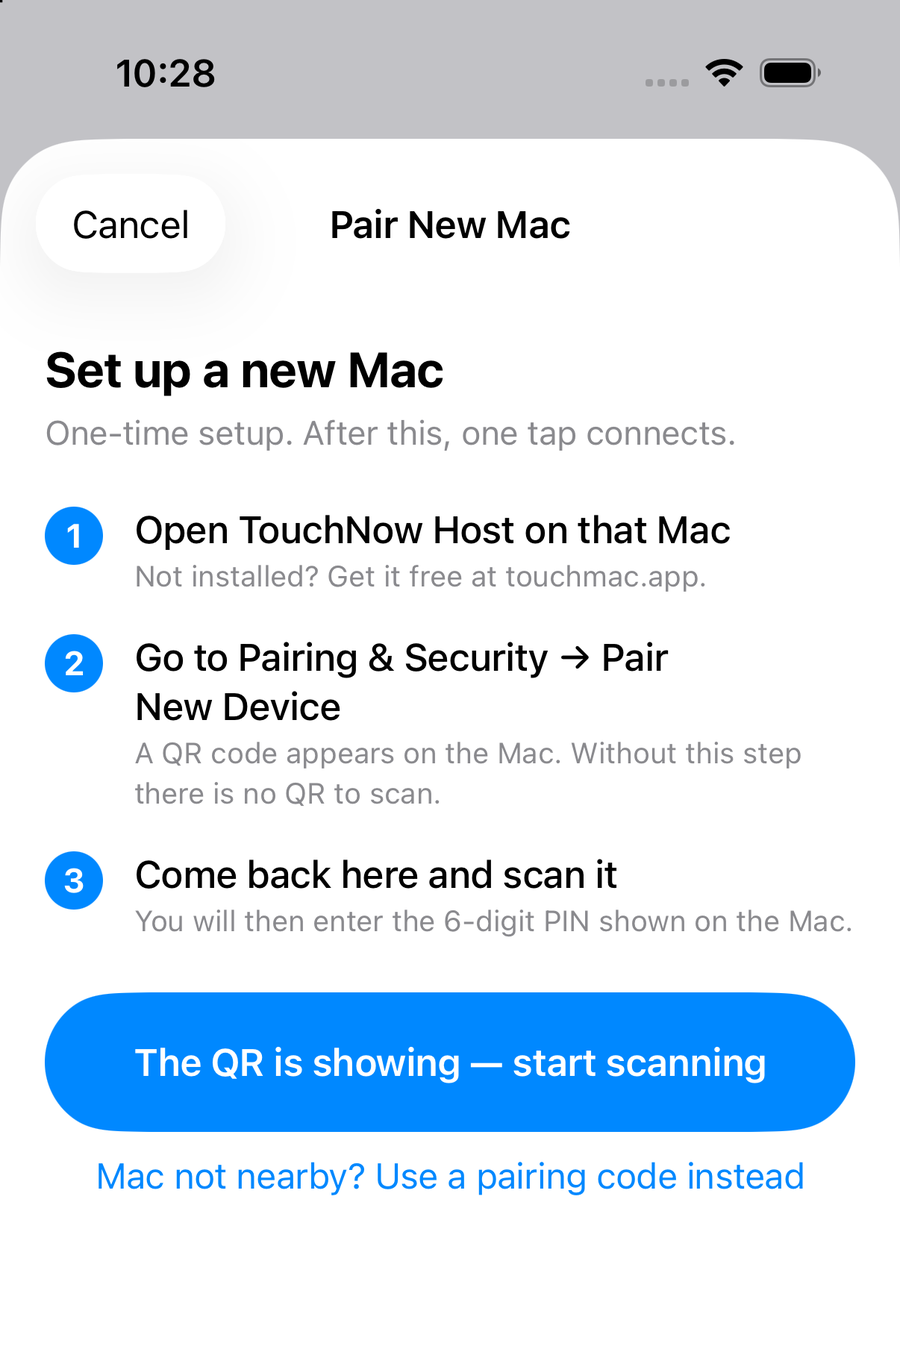 Tap here for the camera
Follow the three steps, then tap “start scanning”
You just did the first two on the Mac, so go straight to the blue button and point the camera at the QR on your Mac’s screen.
Mac not nearby? Tap “Use a pairing code instead” below, then click “Copy Encrypted Pairing Code” on the Mac and paste it.
What you get once you’re connected
Three ways to control
Trackpad (drag like a MacBook), direct touch (tap where you want to go), or a game controller. Switch any time.
A full MacBook keyboard
Esc, F1–F12, arrow keys and ⌘⌥⌃⇧ are all there, so your shortcuts still work.
A second display
Turn your iPhone or iPad into a second desktop for your Mac and drag windows onto it.
Pairing is a one-time thing — from now on your Mac is right there in the list and one tap connects. Stuck? The FAQ covers connection problems, stutter, and permissions that look granted but don’t work; or just email [email protected].